Fonts, colors, templates and your logo
Style Settings controls the look of your whole website, including your pages and blog posts. You can change your template, color scheme, fonts and logos, and set your photography category.
Opening Style Settings
- In your Focal account, under WEBSITE in the left menu, click Homepage Editor.
- Scroll to the bottom of the list of sections and click Style Settings.
Changes appear in the preview as soon as you click them. To keep your changes, click Save at the top of the panel.
Changing your template
You can change your website’s template in Style Settings > Foundation Base > Change Templates. A new template applies its layout and styling across your whole website, while your content stays the same, so you don’t have to start over.
Plans
To change your template:
- In Style Settings, under Foundation Base, click Change Templates.
- Click a template to see it in the preview.
- When you’ve found the one you want, click Save.
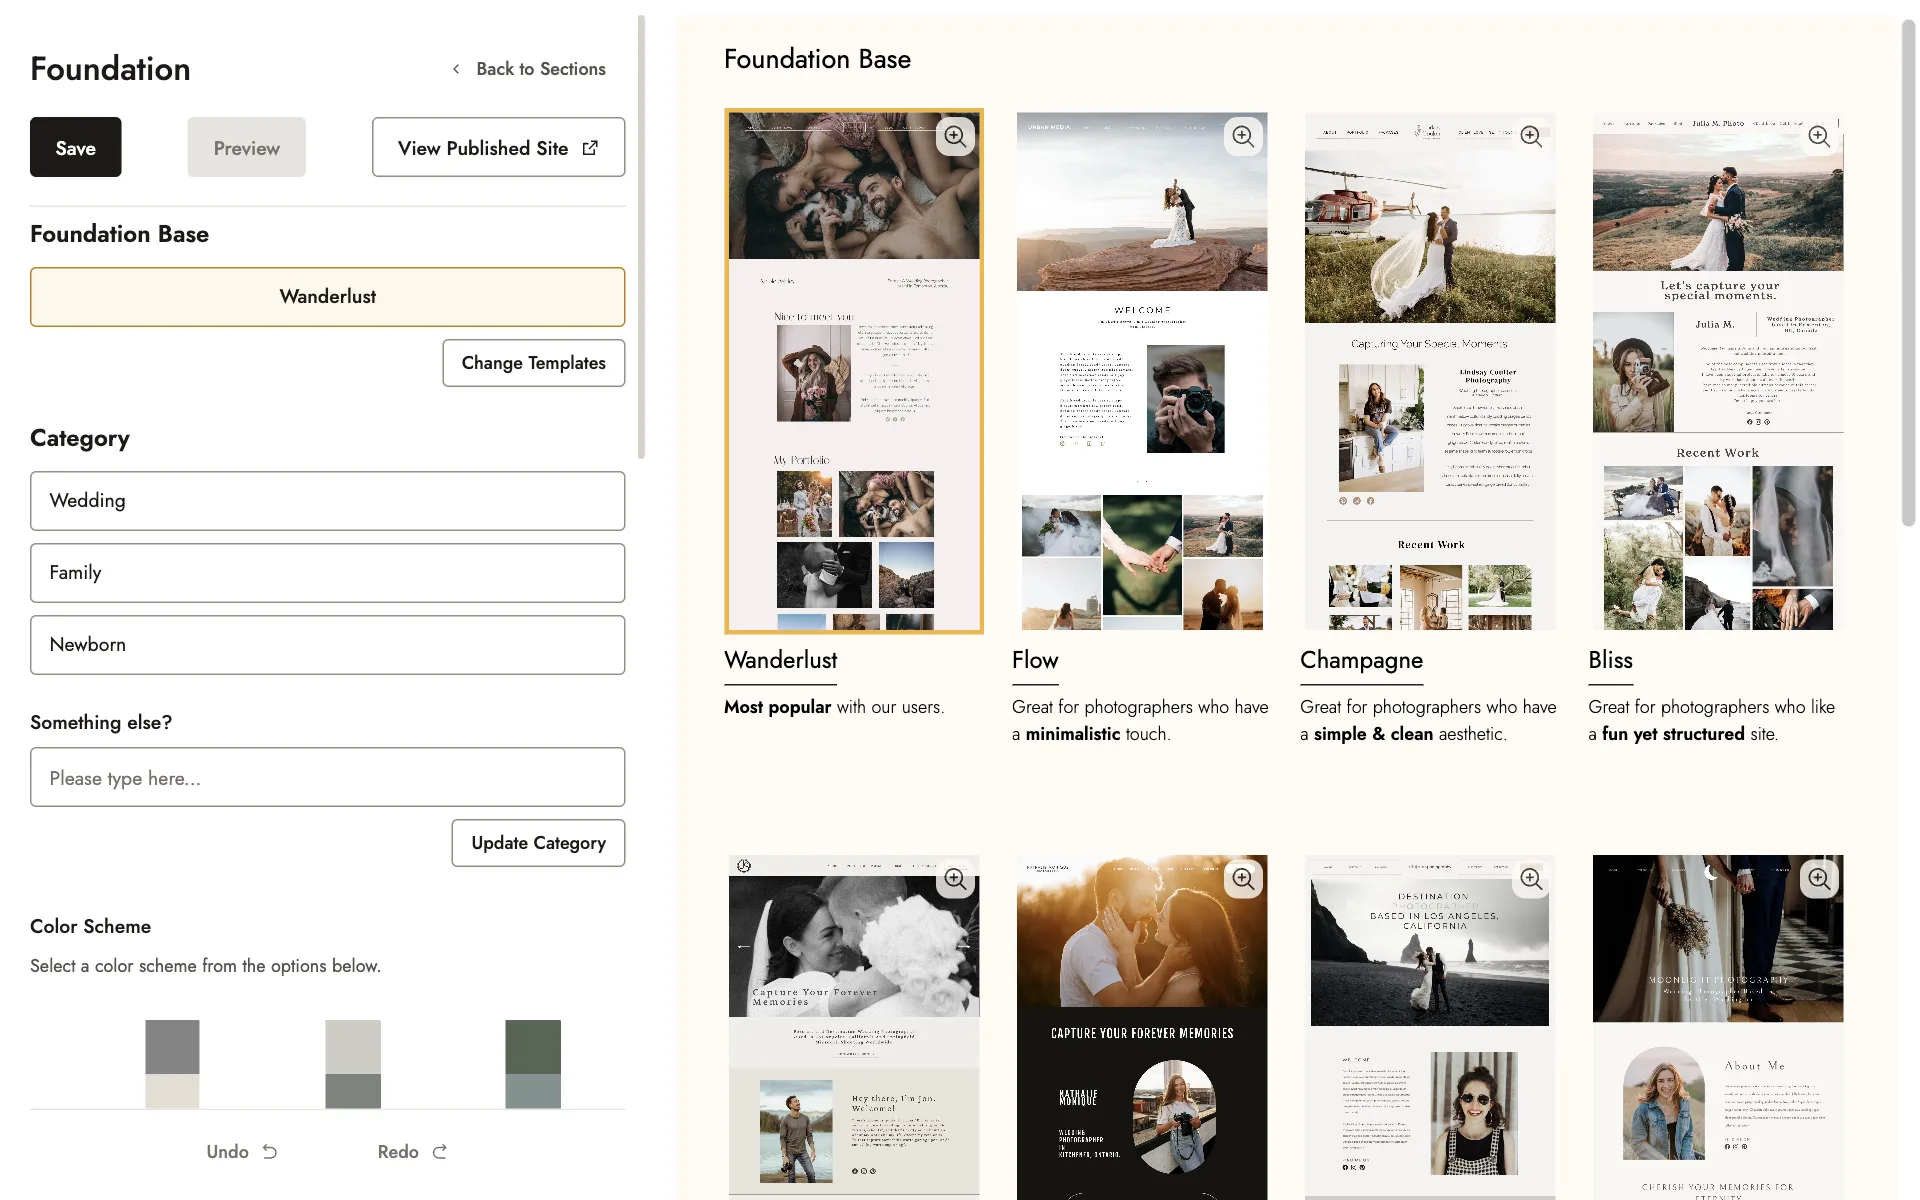
Text can wrap unevenly in the preview, because it’s narrower than a full browser window. This doesn’t affect your live website.
Changing your color scheme
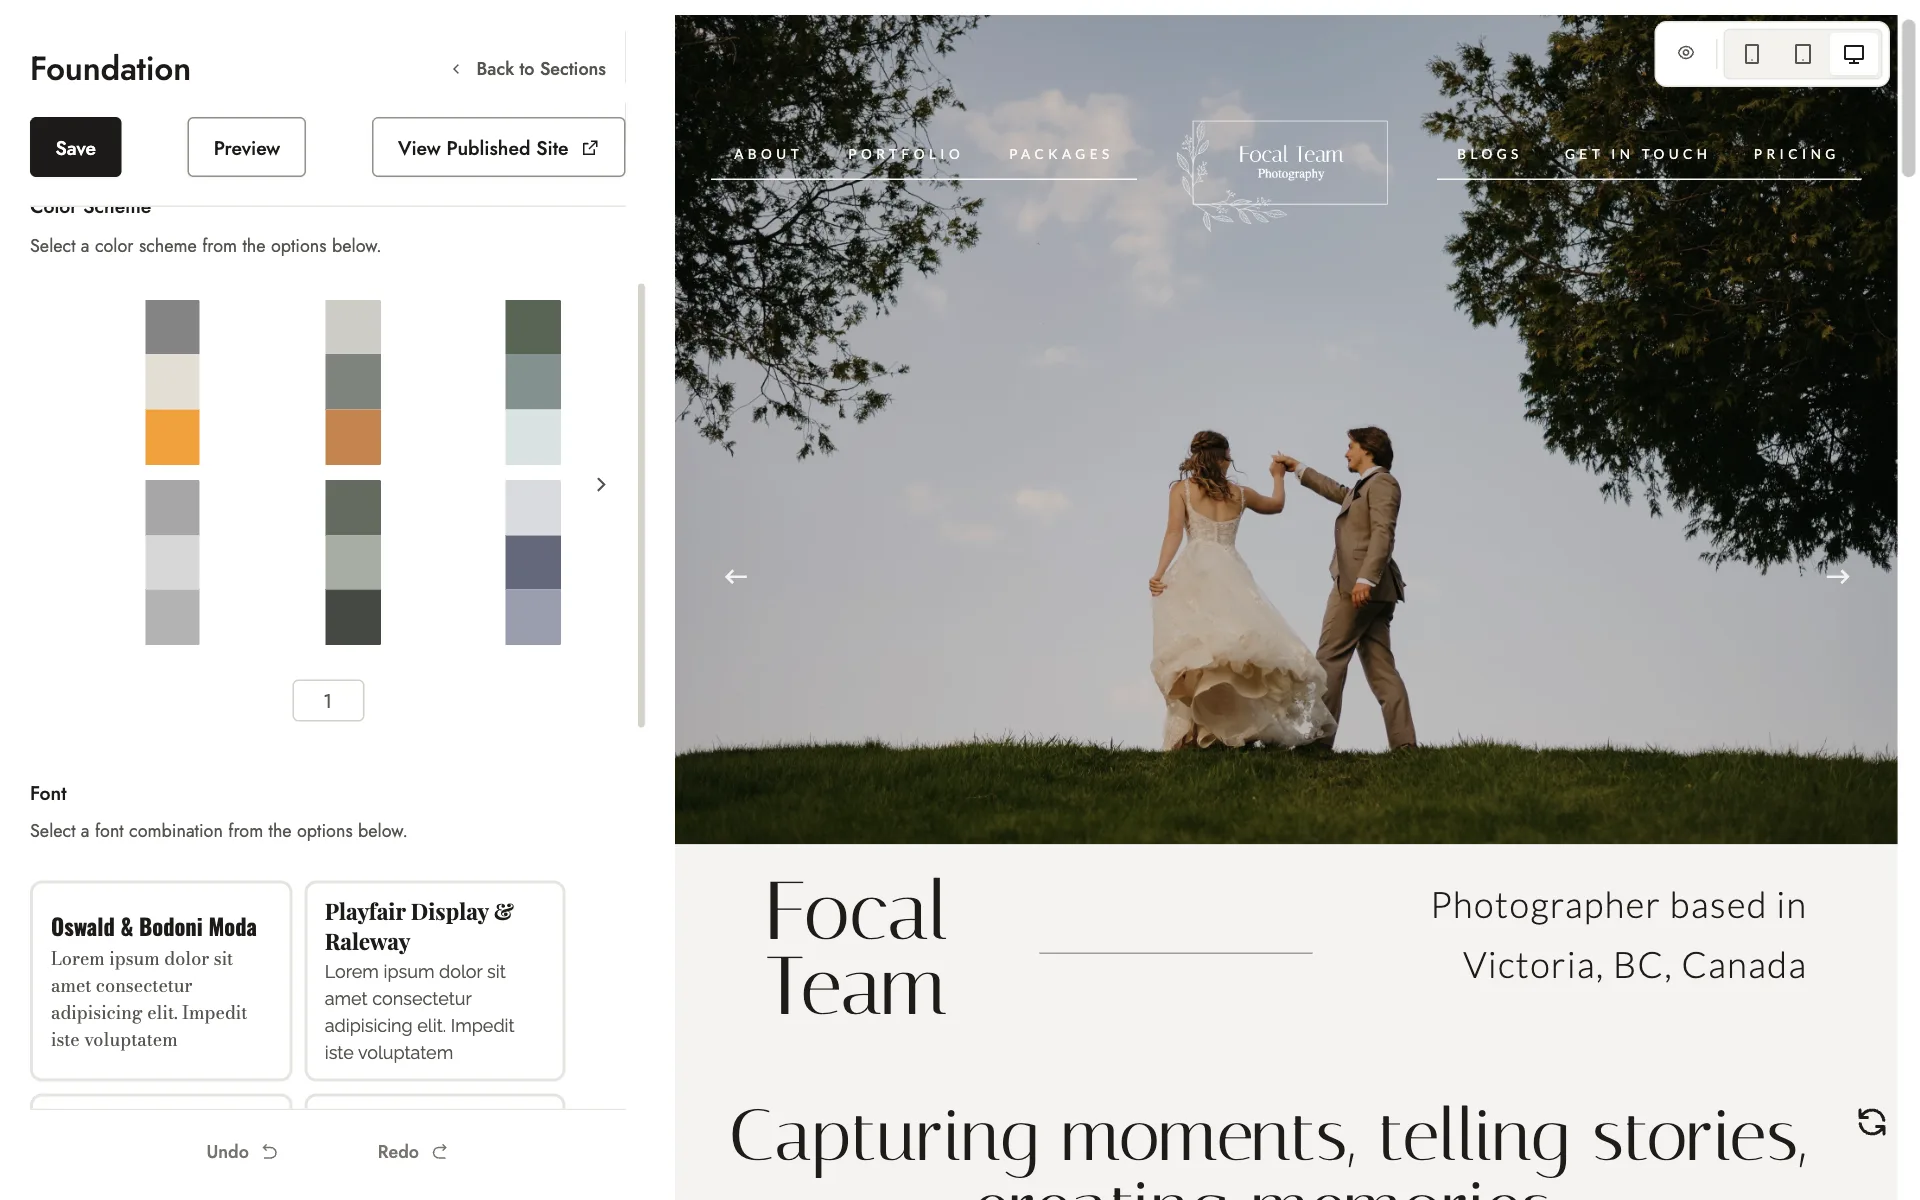
Your color scheme sets the colors of your website’s backgrounds, text and accents. You can choose from 100 preset color schemes, but you can’t enter your own colors.
To change your color scheme:
- In Style Settings, find Color Scheme.
- Click a scheme to see it in the preview. To see more schemes, use the arrows.
- Click Save.
Changing your fonts
You can choose from preset pairs of heading and body text fonts, but you can’t upload your own fonts. In each pair’s sample, the larger text is the heading font and the smaller text is the body font.
To change your fonts:
- In Style Settings, find Font.
- Click a pair to see it in the preview. To see more pairs, use the arrows.
- Click Save.
Uploading your logos
Your website uses two versions of your logo: a Light logo for dark backgrounds, and a Dark logo for light backgrounds. Focal uses whichever one suits the background in each place, such as your menu and footer.
Tip
Each logo can be a JPEG or PNG file of up to 100kb. If your file is larger, save a smaller copy first.
To upload your logos:
- In Style Settings, find Light - Logo and Dark - Logo.
- Click Upload under each one and choose your file.
- Click Save.
To go back to your template’s original logo, click Reset to Default.
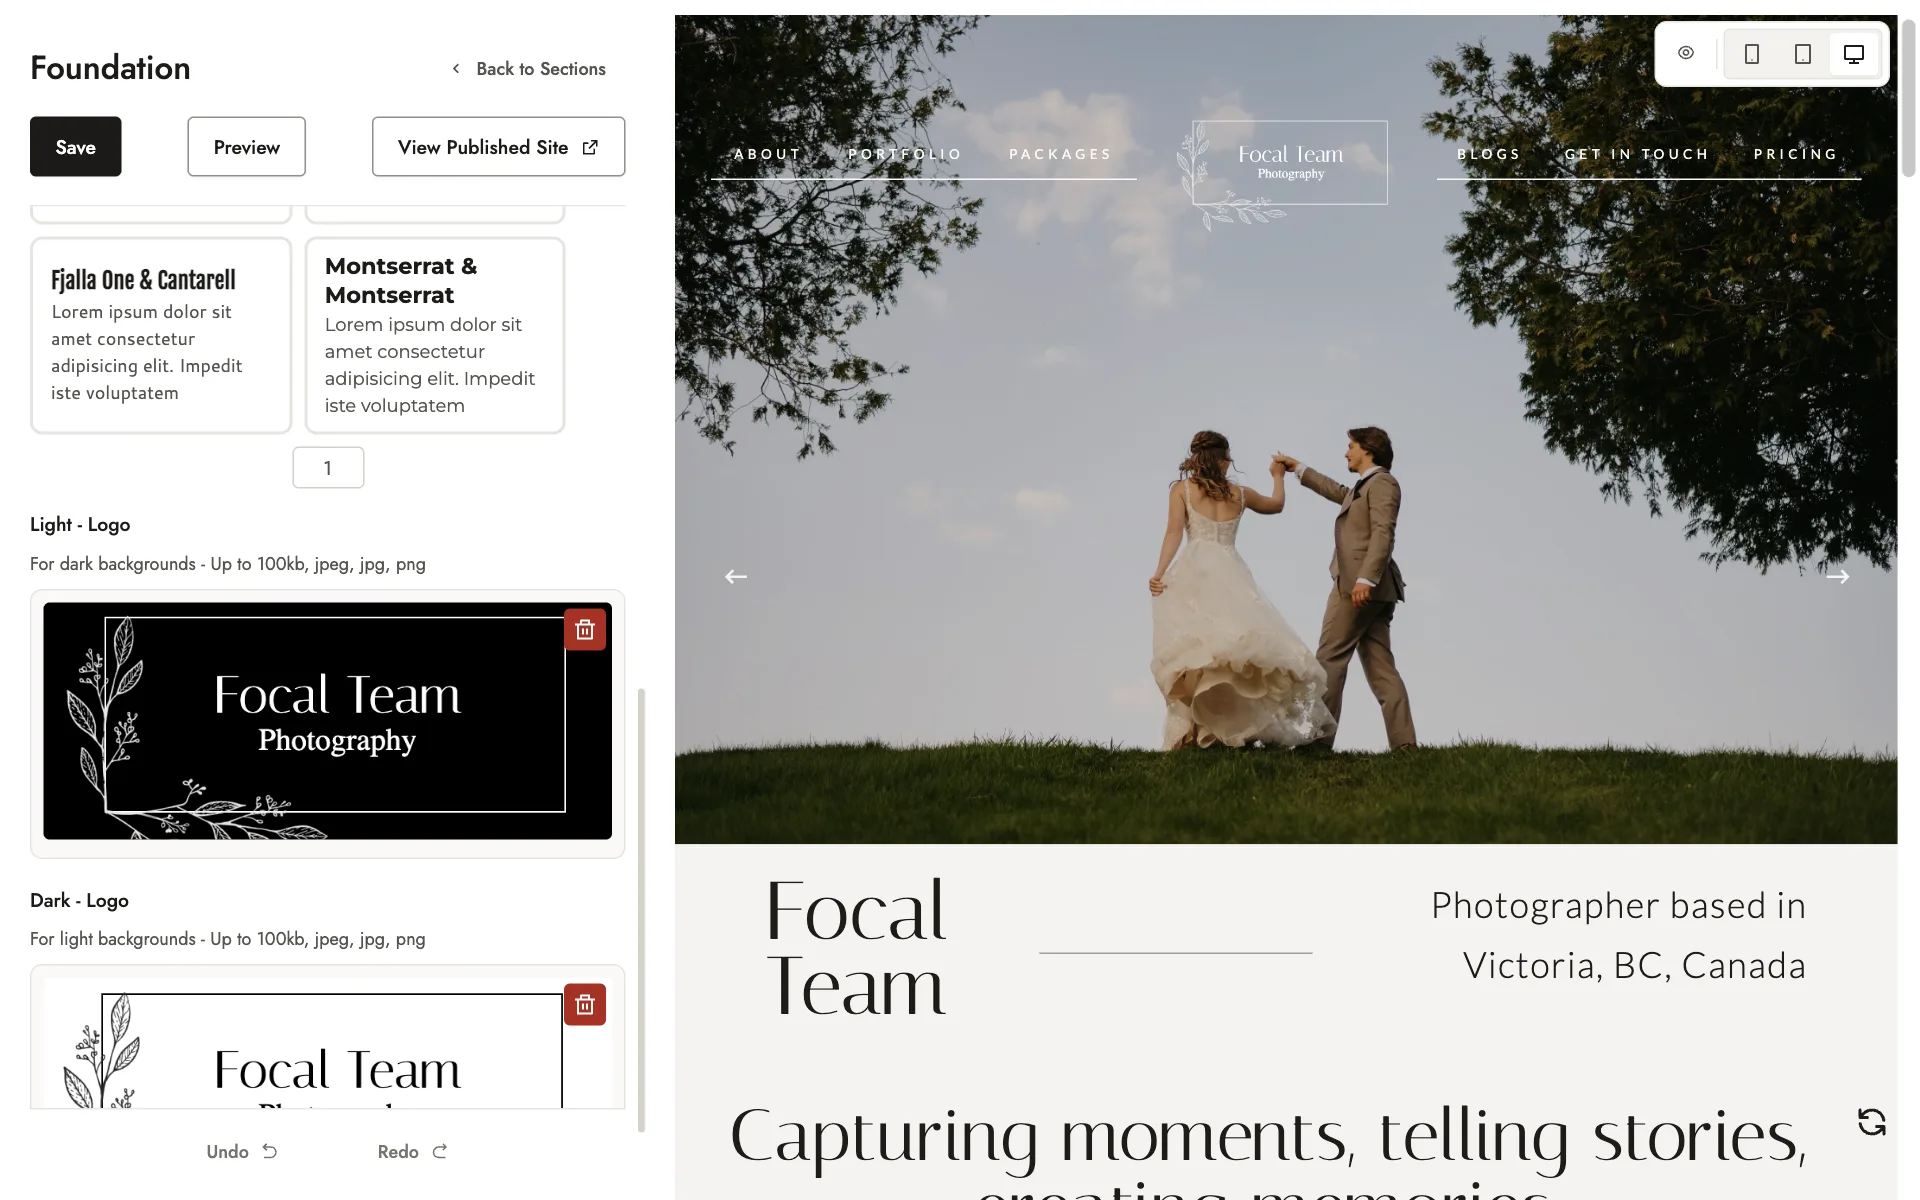
These two logos are only used on your website. Your Company Logo and favicon are set separately, in your Profile. See Your profile.
Setting your photography category
Your category is the type of photography you offer, and setting it helps your SEO. You can choose Wedding, Family or Newborn, or enter your own.
Package categories are separate. You set them on each package, and they organize your packages page.
To set your category:
- In Style Settings, find Category.
- Click Wedding, Family or Newborn. For anything else, type it under Something else? and click Update Category.
- Click Save.
Check it worked
Before you save, click the phone icon above the preview to check your new look on a phone. After you save, click View Published Site to see your changes on your live website.
In the list of sections, Hero Header shows a green tick once both logos are uploaded.
Related guides
- Your homepageWhat each section of your homepage shows, and how to edit your About, Portfolio, Video, and Testimonials sections.
- Your profileName, company, location, phone, photos, logos, reviews and social links, and where they appear.
- Changing your hero imagesReplace the large photos or video at the top of your homepage, for desktop and for mobile.
- Featuring packages, posts, galleries and pagesChoose which packages, galleries, blog posts and pages appear on your homepage, and in what order.
Still need help?
Email contact@bookfocal.com and a member of our team will help you.