Blog posts and the AI assistant
Blogging is the best way for you to improve your website’s visibility and SEO, because it adds written context to your website. Your photos show clients your style; the text helps search engines understand what you photograph, where you work, and which searches your content is relevant to.
Why blogging helps
Tip
Blog posts about the photography you offer, the locations you serve, and the questions your clients ask are the strongest options. Include keywords, such as your city, session type, or venue name, to help search engines understand what each post is about.
Publishing helpful posts can also give potential clients more ways to discover your work and keeps your website’s content fresh. You can also use them to showcase recent sessions, share advice, and introduce your approach to photography.
Adding a blog post
Plan required
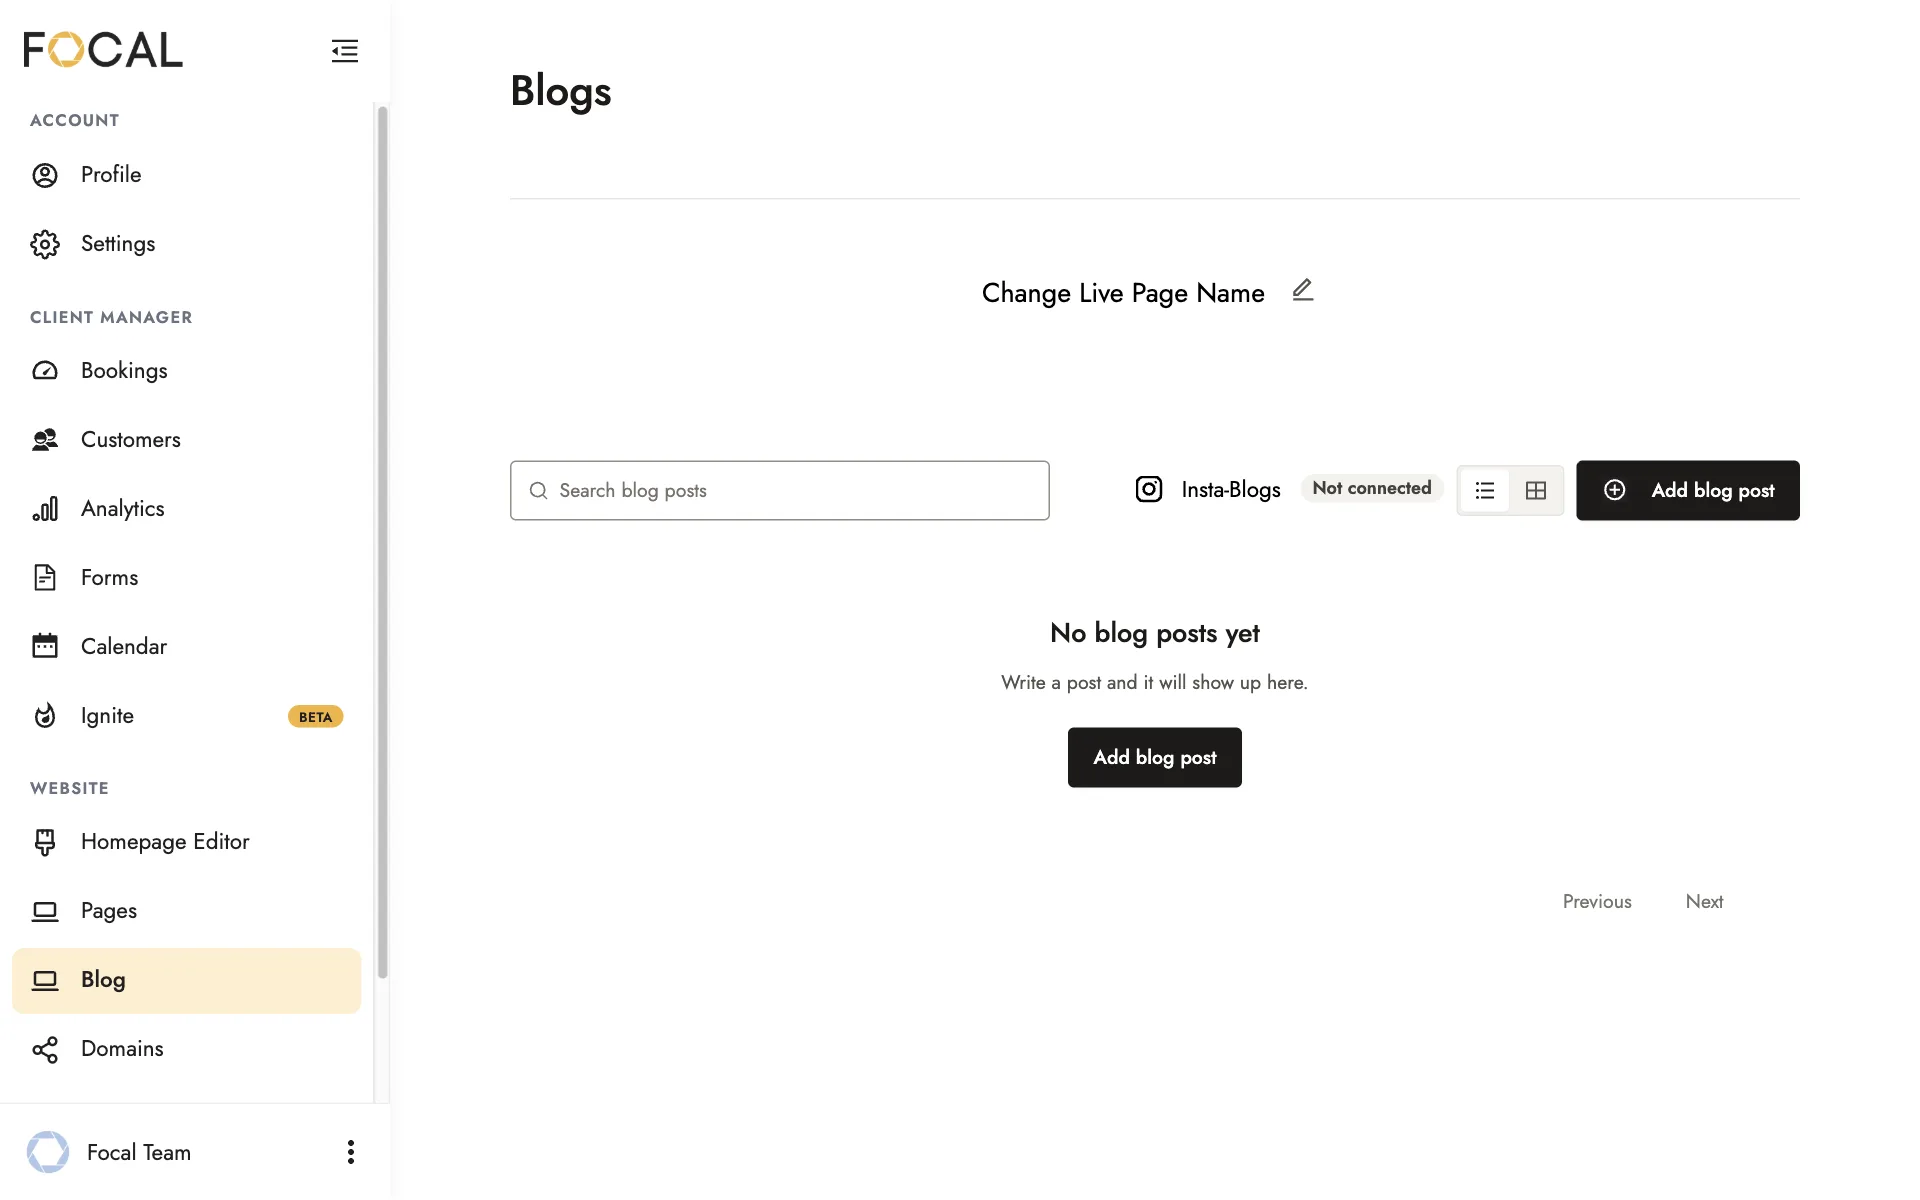
- Select WEBSITE > Blog in the left menu.
- Click Add blog post.
- Choose Prompted, Insta-blog, or New.
- Create and review your content.
- Click Save to save your work, then Publish when you’re ready to make it live.
Ways to start a post
Using the Blog Generator
Choose Prompted to open the Blog Generator.
Select a suggested prompt or write your own, then click Next. To see different suggestions, click Generate new prompts.
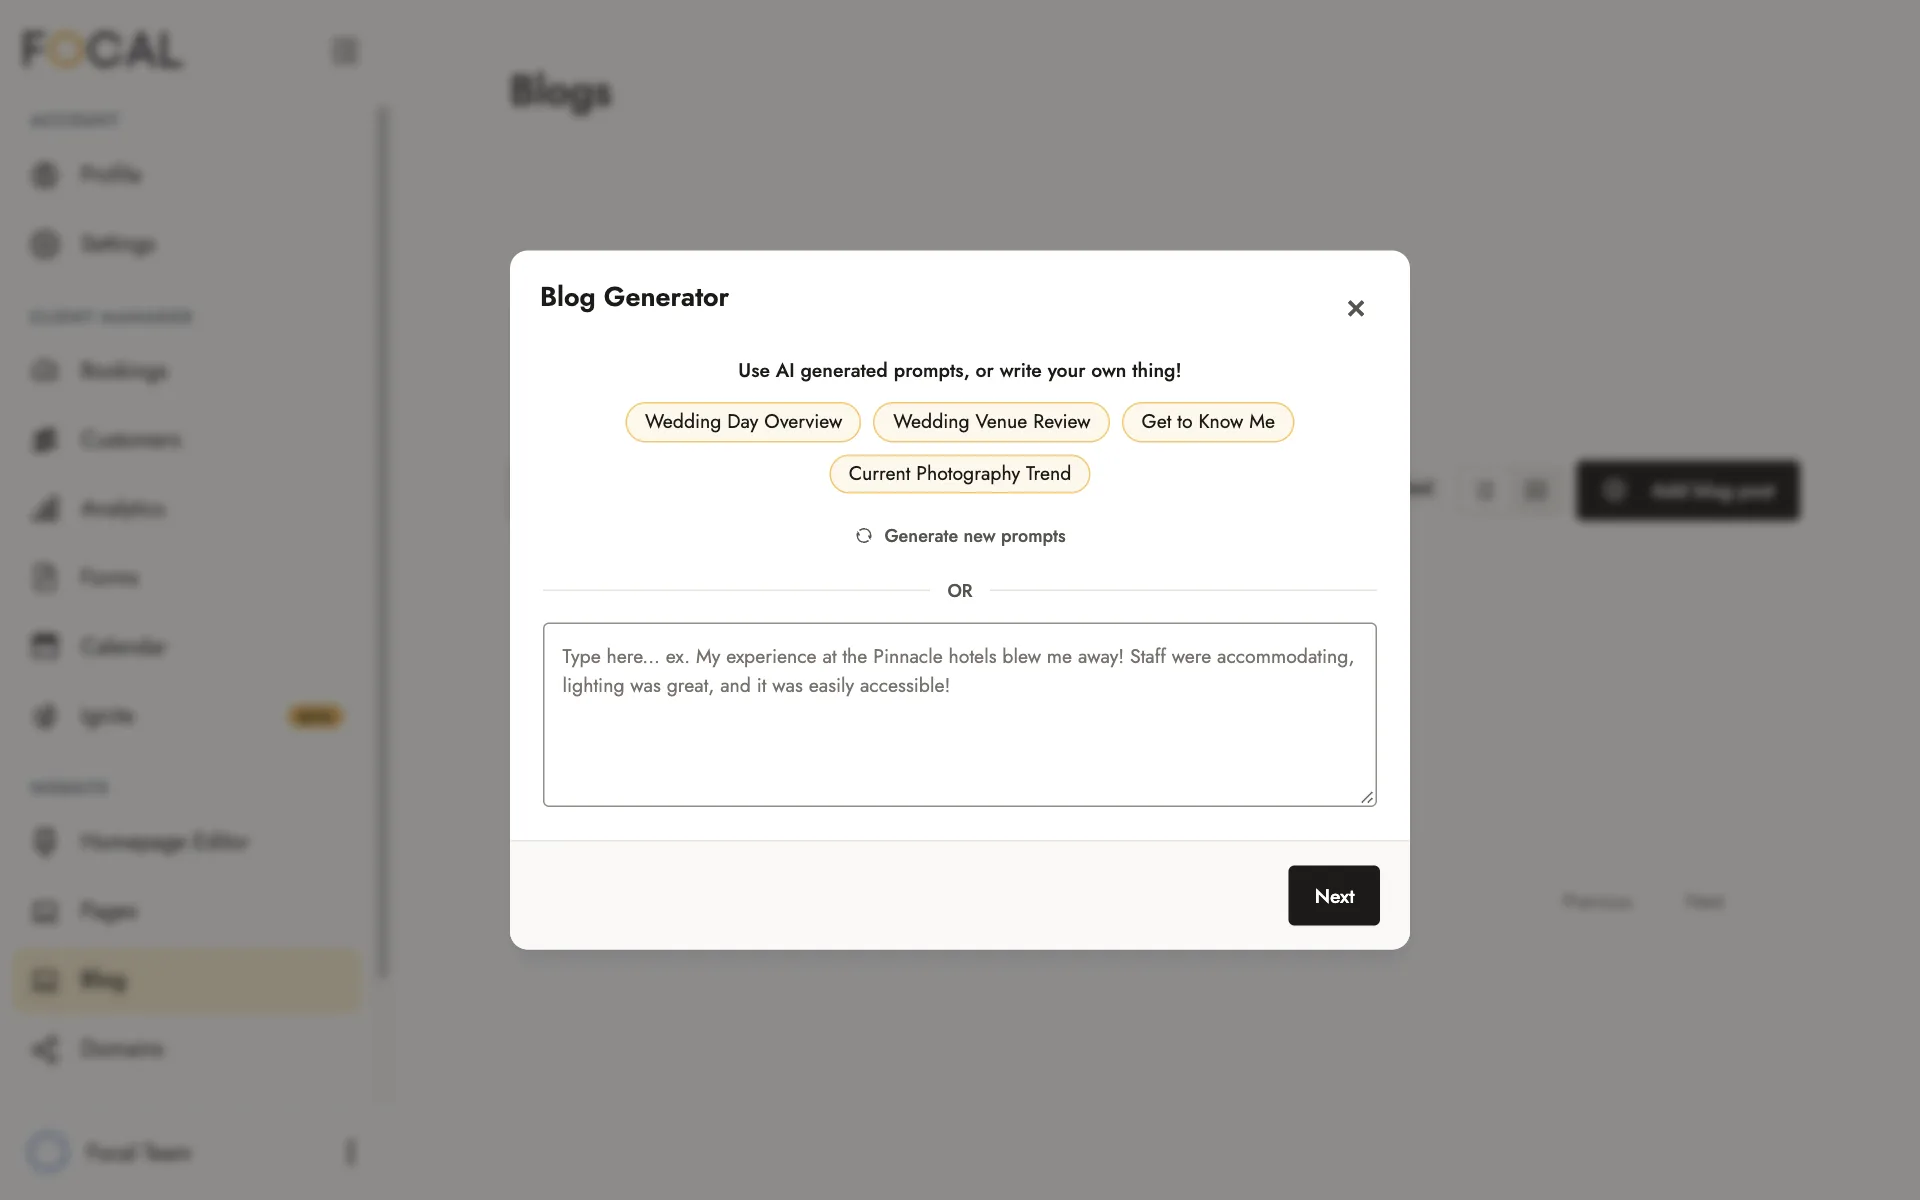
For a more relevant draft, include details such as the topic, location, type of photography, and advice you want to share.
Before publishing: Review the draft, check names and factual details, and add your own experience and photos. Remove any claims about sessions, venues, or services that aren’t accurate.
Turning an Instagram post into a blog post
Choose Insta-blog to create a blog post from an Instagram post. The photo becomes the post’s image, and the caption becomes its text. This is especially useful for posts with detailed captions.
To connect Instagram:
- Open your Blog list.
- Click the Insta-Blogs menu at the top.
- Select Connect and follow the prompts.
The menu shows Not connected until your account is connected.
Review the imported content before publishing. You can expand the caption with more details or advice for visitors to your website.
Starting from a blank post
Choose New to start with a blank post and write your own content.
Managing your blog posts
The Blog list shows all your posts. Check the Status column to see whether a post is published, or click View live to open a published post on your website.
Open the actions menu beside a post to:
- Duplicate it.
- Unpublish it.
- Move it to your pages.
- Delete it.
To change the name displayed on your website (for example, from Blogs to Journal), click Change Live Page Name at the top of the list.
To add an introduction to your blog page, click Add Live Page Description.
Editing a blog post
Blog posts use the same editor as pages. You can edit text, add photos and videos, and rearrange content sections. See Creating and editing pages.
Click Save when you’re finished. If the post is already published, saving updates your live website immediately.
AI-assisted text
Give your AI Assistant guidance about your voice so its drafts better reflect your business.
- Select ACCOUNT > Settings > AI Assistant.
- Under Writing style, describe your preferred tone, paste a sample of your writing, or both.
- Click Save changes.
Include how you refer to yourself, the tone you prefer, and anything you want the AI to avoid. For example, if you work alone, ask it to use “I” and “my” rather than “we” and “our team.”
Example writing-style instructions:
Use the writing sample below as a reference for my tone and style. I’m a solo photographer, so write in the first person using “I” and “my.” Don’t refer to a team.
Keep the writing friendly, down to earth, and straightforward. Avoid flowery language and unnecessary filler. Use the sample for style, without adding facts from it to unrelated posts.
Writing sample:
[Paste a few paragraphs from your About page or a recent blog post.]
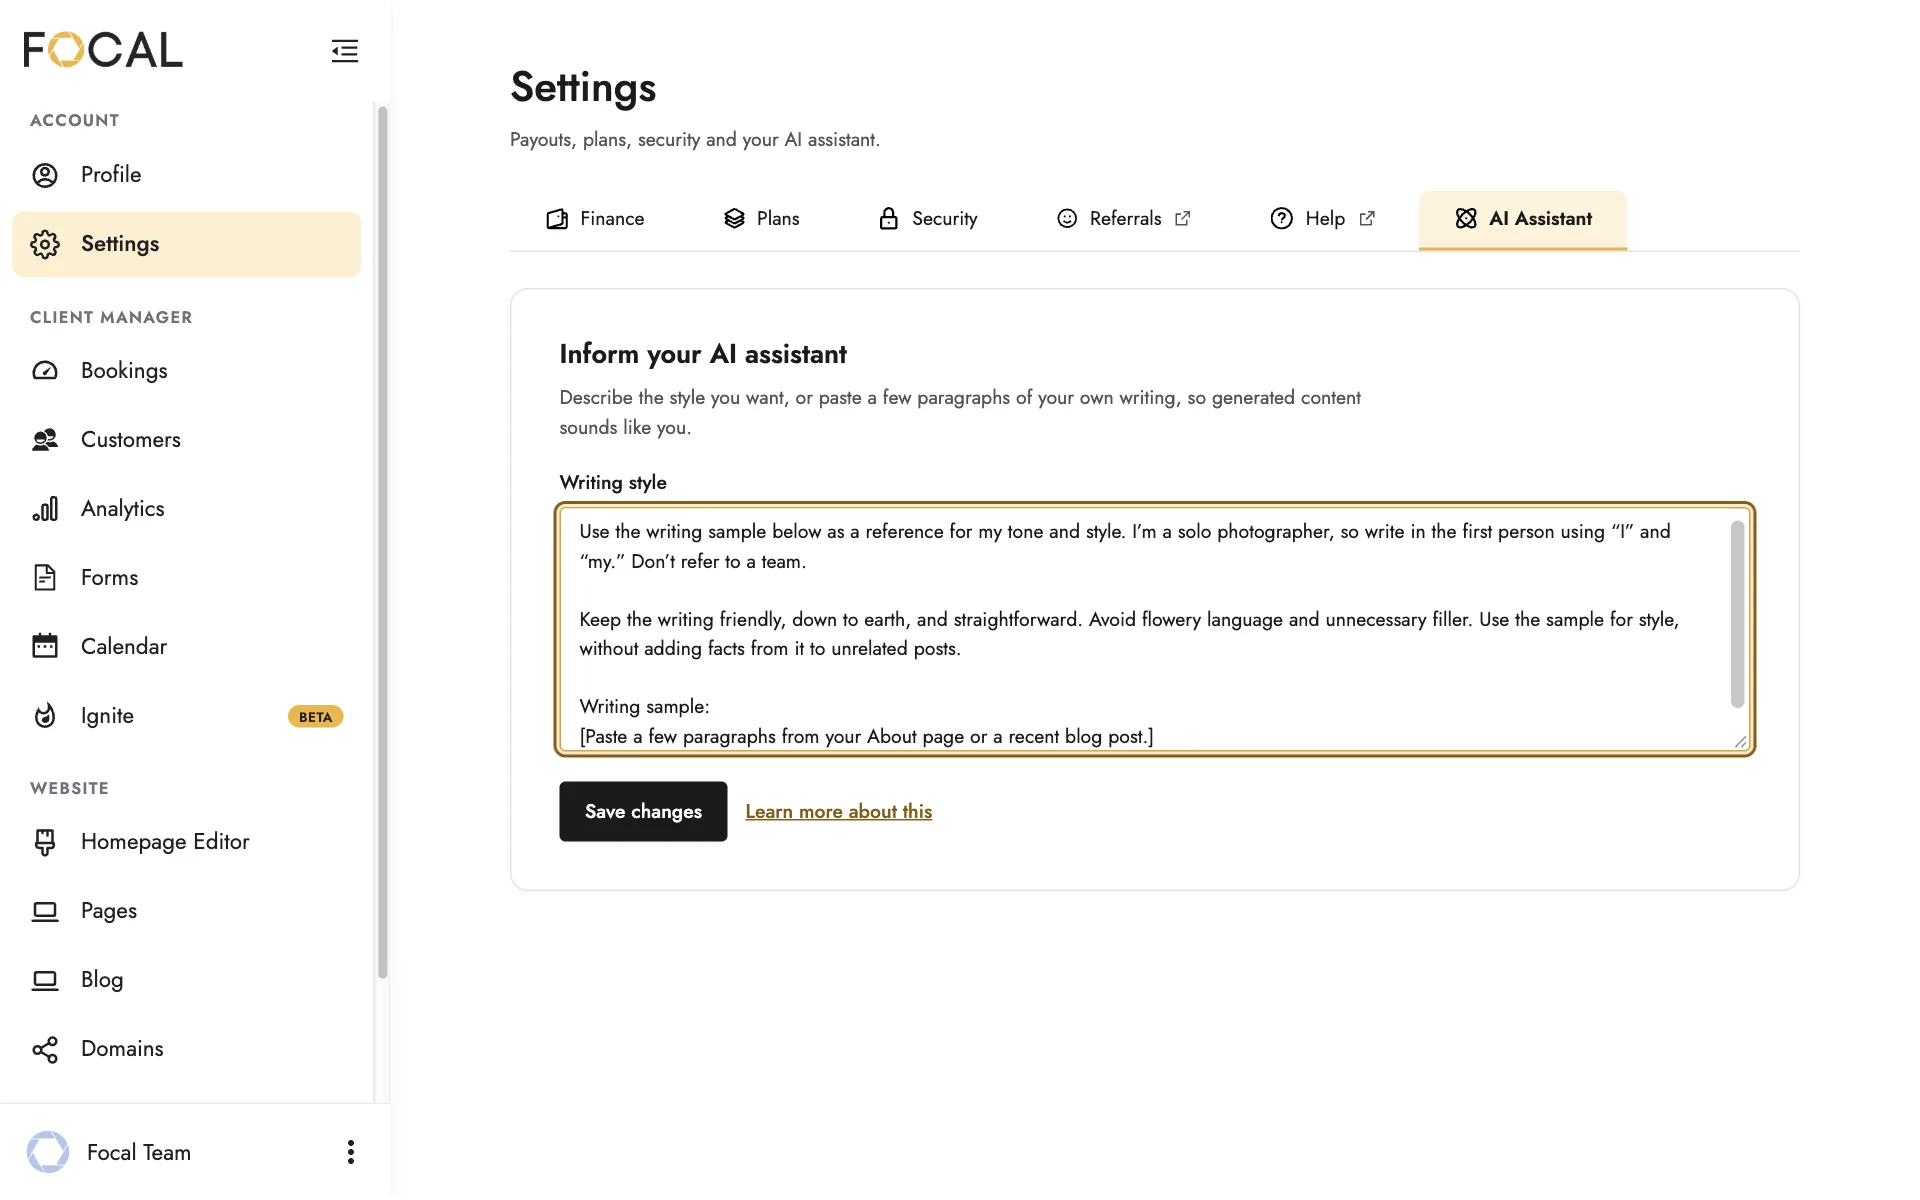
You can also access these settings through Inform my AI Assistant in your homepage’s About section.
Choosing topics for your blog
Start with questions your clients ask and experiences you can speak about firsthand. For example:
- How to prepare for an engagement session.
- What to wear for a portrait or family session.
- What to expect when working with you.
- A recent shoot, with photos and the story behind it.
- Advice about locations or venues you’ve photographed.
Mention your photography services and location naturally where they’re relevant. Focus on useful information rather than repeating keywords or publishing just to meet a schedule.
Other blog options
- Featured Blogs: Display selected posts on your homepage. See Featuring packages, posts, galleries and pages.
- Contact Form: Add a form visitors can use to get in touch. See Contact forms.
Related guides
- Creating and editing pagesAdd and publish a page, add text, photos, and video, and arrange its sections.
- Featuring packages, posts, galleries and pagesChoose which packages, galleries, blog posts and pages appear on your homepage, and in what order.
- Contact formsEdit the contact form on your homepage, pages, blog posts and packages, and find where inquiries arrive.
- Your homepageWhat each section of your homepage shows, and how to edit your About, Portfolio, Video, and Testimonials sections.
Still need help?
Email contact@bookfocal.com and a member of our team will help you.