Bookings and client portals
When a client requests a booking from one of your packages, the request arrives under Bookings. Accepting it sends your client their client portal, where they read your message, sign their contract, and pay.
Your bookings
Plan required
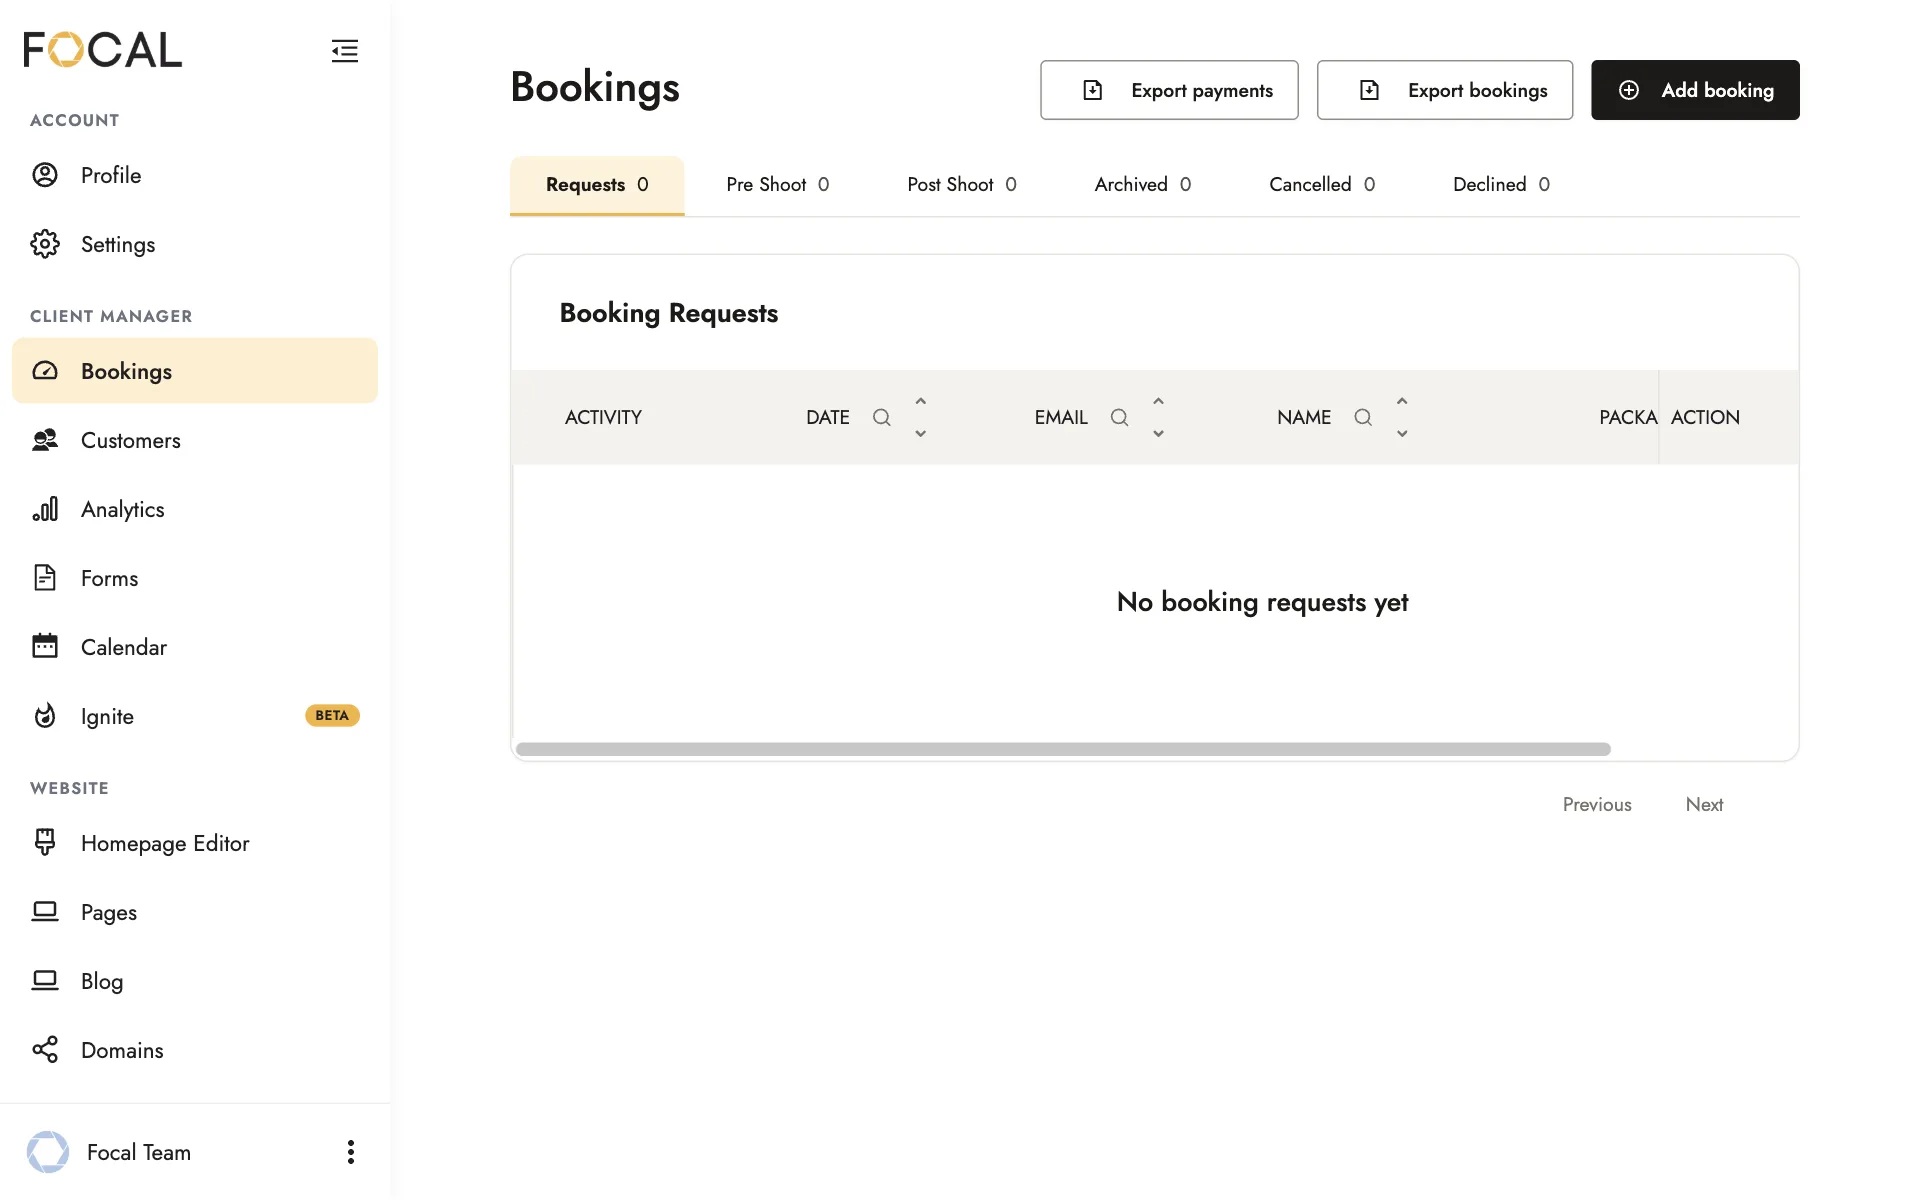
The Bookings page sorts your bookings into tabs by stage:
| Tab | What it holds |
|---|---|
| Requests | New booking requests, waiting for you to accept or decline them |
| Pre Shoot | Accepted bookings whose session hasn’t happened yet |
| Post Shoot | Bookings whose session date has passed |
| Archived | Bookings you’ve archived |
| Cancelled | Bookings you’ve cancelled |
| Declined | Requests you’ve declined |
Bookings move from Pre Shoot to Post Shoot by themselves once their date passes.
Accepting a booking request
- Select CLIENT MANAGER > Bookings in the left menu, then open the request from the Requests tab.
- Check the date, location, and your client’s details, and fill in anything that’s missing. If you haven’t agreed on a date yet, tick TBD.
- To attach a contract or questionnaire, click Select Template beside it.
- Write a note to your client under Message to Client.
- Check the package and price on the right.
- Click Client Portal Preview to see what your client will see.
- Click Accept and Create Client Portal.
Your client is emailed a link to their portal, unless you untick Send Email Notification first.
If Stripe isn’t connected, Focal asks whether to continue without it. See Getting paid.
To turn a request down, click Decline Request. It moves to the Declined tab, where Revert to Request in its actions menu brings it back.
Setting up the client portal
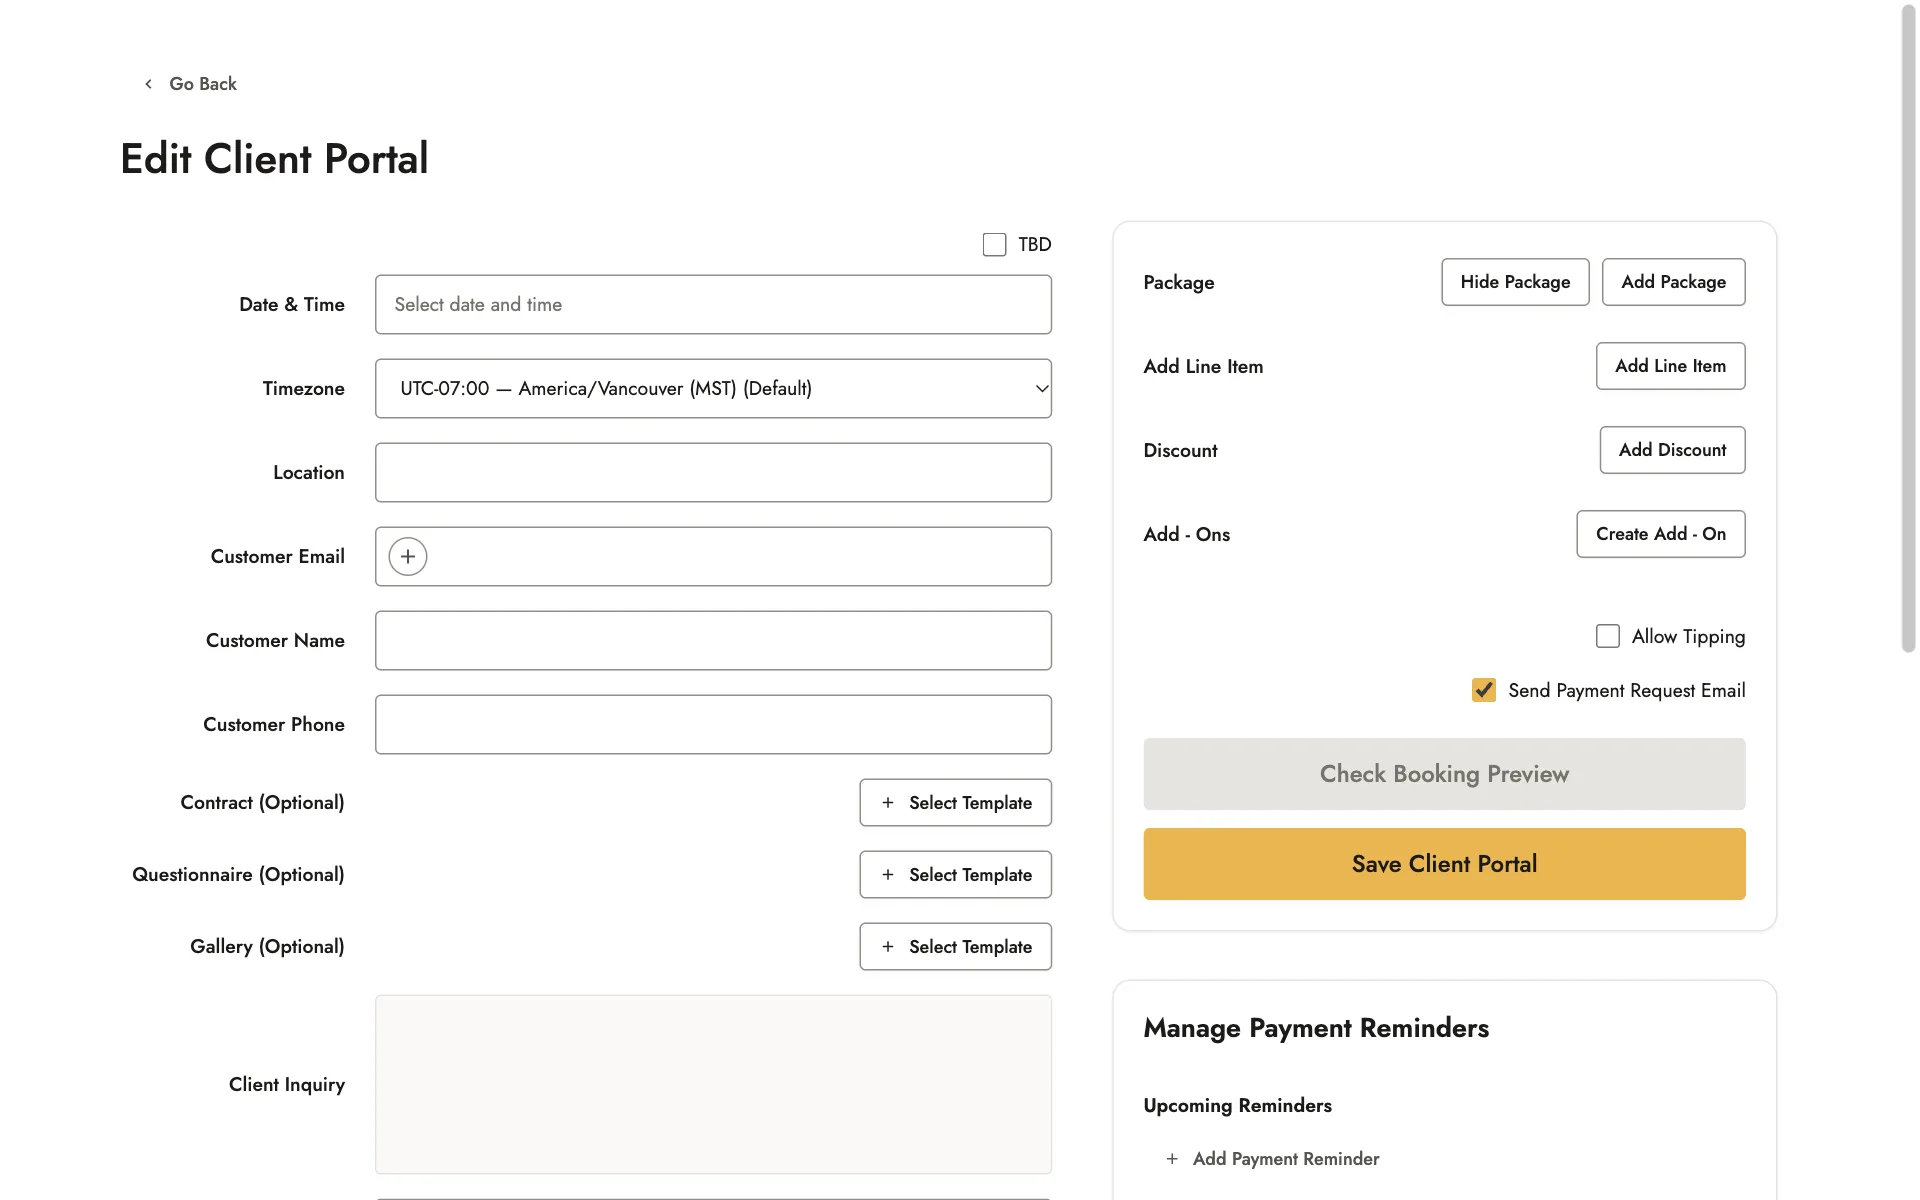
You set up your client’s portal on the booking’s page.
Contracts, questionnaires, and galleries
Select Template attaches one of the contracts or questionnaires you’ve saved under Forms. You can attach two contracts, such as your main contract and a model release. See Contracts and questionnaires.
To change a contract’s wording for this booking only, click Customize. Your saved template stays as it was.
You can also attach a gallery under Gallery, such as your client’s photos after the shoot. See Client galleries.
Messages and notes
- Client Inquiry shows what your client wrote in their request.
- Message to Client appears at the top of their portal, as Photographer Memo.
- Private Notes are only for you. Your client never sees them.
The price
On the right, you can change the package, add a line item for anything not in it, add a discount, or create an add-on for this booking. Hide Package keeps the package’s details out of the portal.
The tax rate, tips, and payment reminders are set here too. See Getting paid.
Adding a booking yourself
If a client books you by email or in person, you can still send them a client portal.
- Click Add booking at the top of the Bookings page.
- Fill in your client’s details and the booking.
- Choose a package with Add Package.
- Click Save Client Portal.
Send Payment Request Email starts ticked, so your client is emailed when you save. Untick it to save without emailing them.
Managing your bookings
Open a booking’s actions menu on the Bookings page to:
- Edit it. Your changes reach the portal when you click Save Client Portal.
- Copy Booking Link to send your client their portal again.
- Record Outside Payment or Send Payment Reminder. See Getting paid.
- Add to Calendar to add it to your Google Calendar. See Your calendar and availability.
- Archive it. To bring it back, choose Unarchive Booking on the Archived tab.
- Cancel it. You can send your client a message about it. A cancelled booking can’t be restored.
What your client sees
The top of the portal shows your cover photo, profile photo, business name, location, reviews, and social links. See Your profile.
Below that are your message, the order details and your policies, any contracts and questionnaires, and the price.
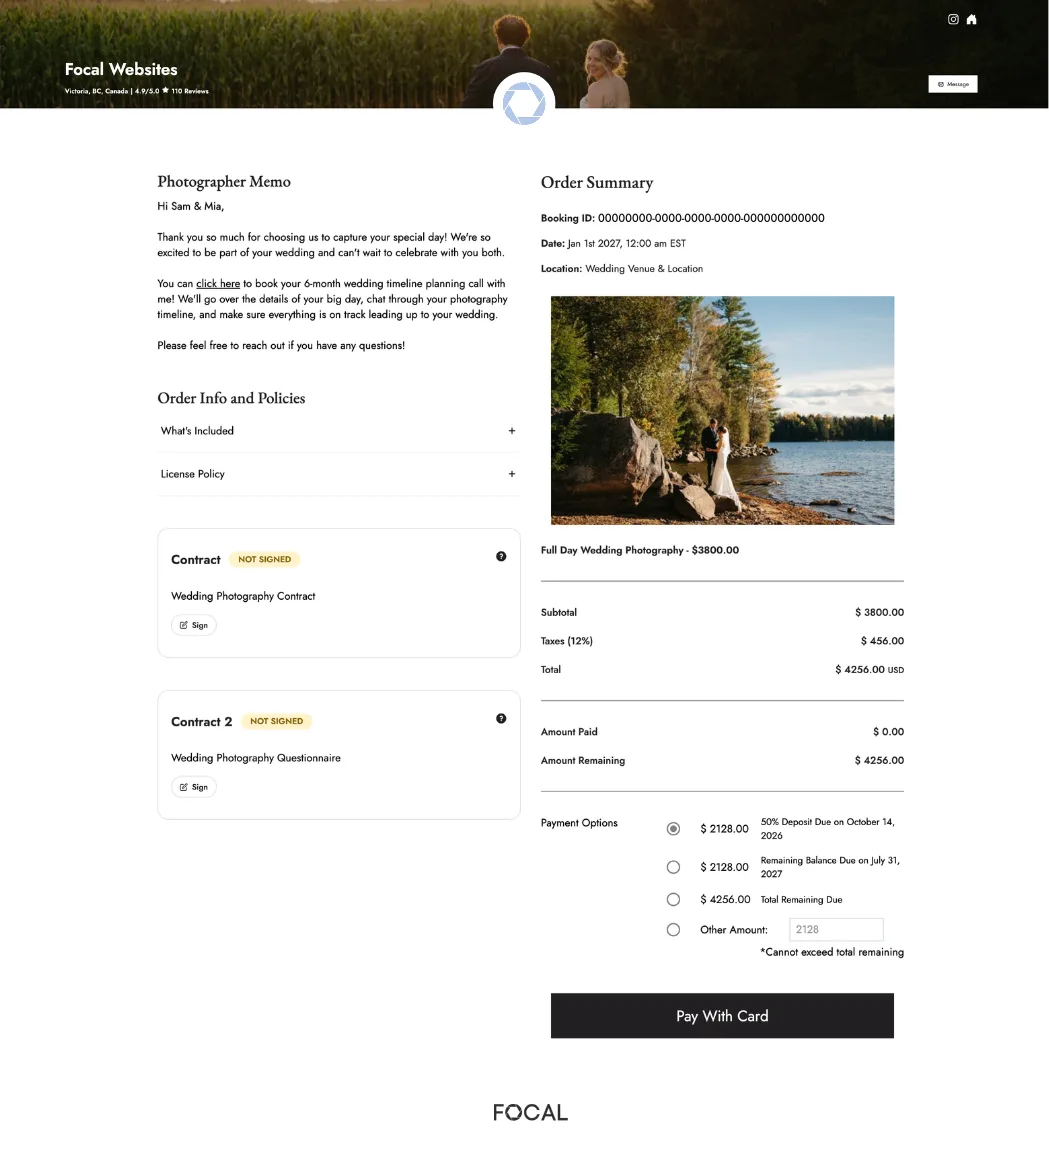
Your client signs a contract by typing their full name and clicking Sign, and pays by card. See Getting paid.
The link stays the same when you change the booking, and your client sees your changes the next time they open it. Anyone with the link can open the portal, so send it only to your client.
Related guides
- Getting paidConnect Stripe, set your tax rate, schedule payment reminders, record outside payments, and see your revenue.
- Contracts and questionnairesCreate contract and questionnaire templates in Forms, add fillable fields, and send them to clients.
- Contact formsEdit the contact form on your homepage, pages, blog posts and packages, and find where inquiries arrive.
- Packages and booking optionsAdd and publish a package, choose how clients book it, create add-ons, and organize your packages page.
Still need help?
Email contact@bookfocal.com and a member of our team will help you.