Client galleries
Deliver your clients’ photos in an online gallery. You can organize the photos into sets, choose whether clients can download them, and see which ones they mark as favorites.
Creating a gallery
Plan required
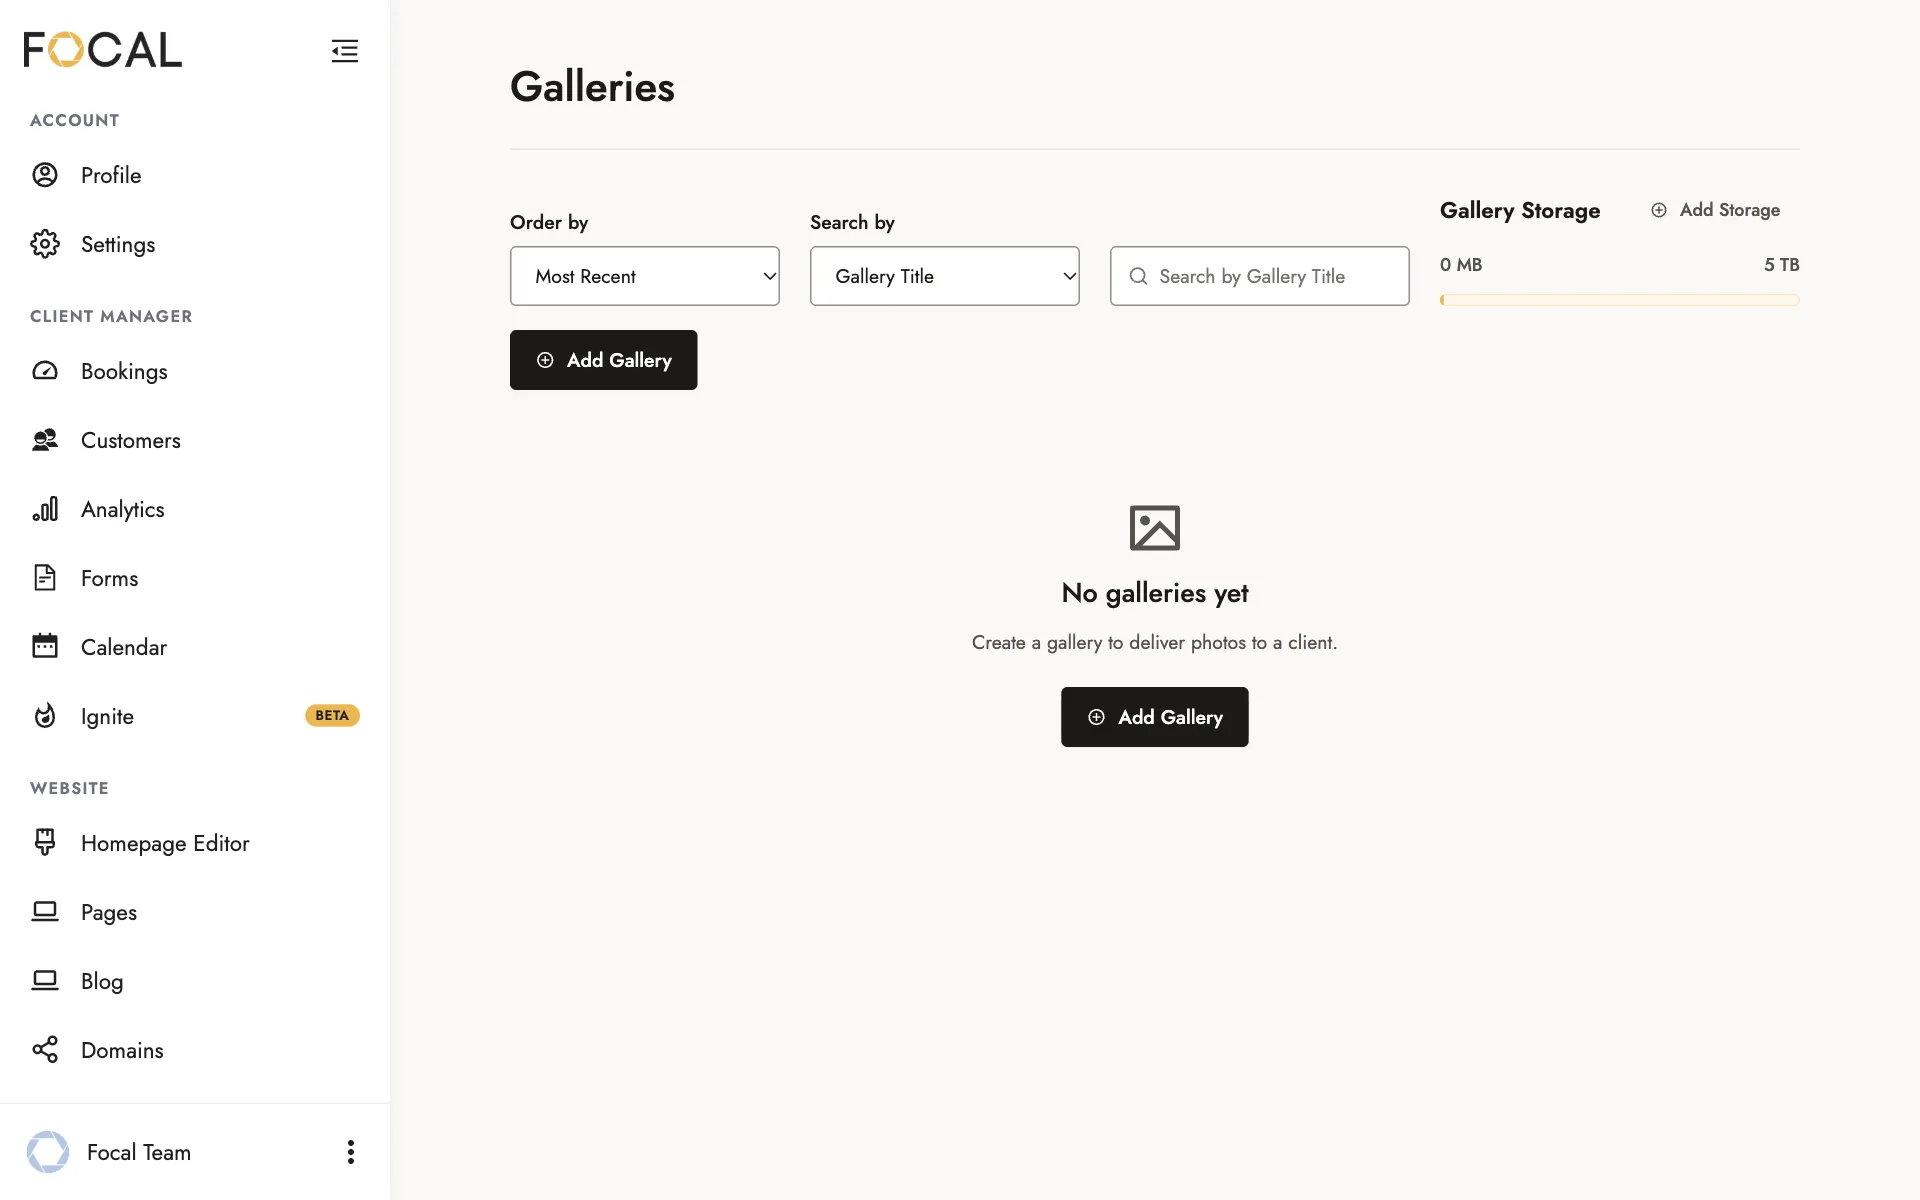
- Select WEBSITE > Galleries in the left menu.
- Click Add Gallery. Your new gallery opens as a draft.
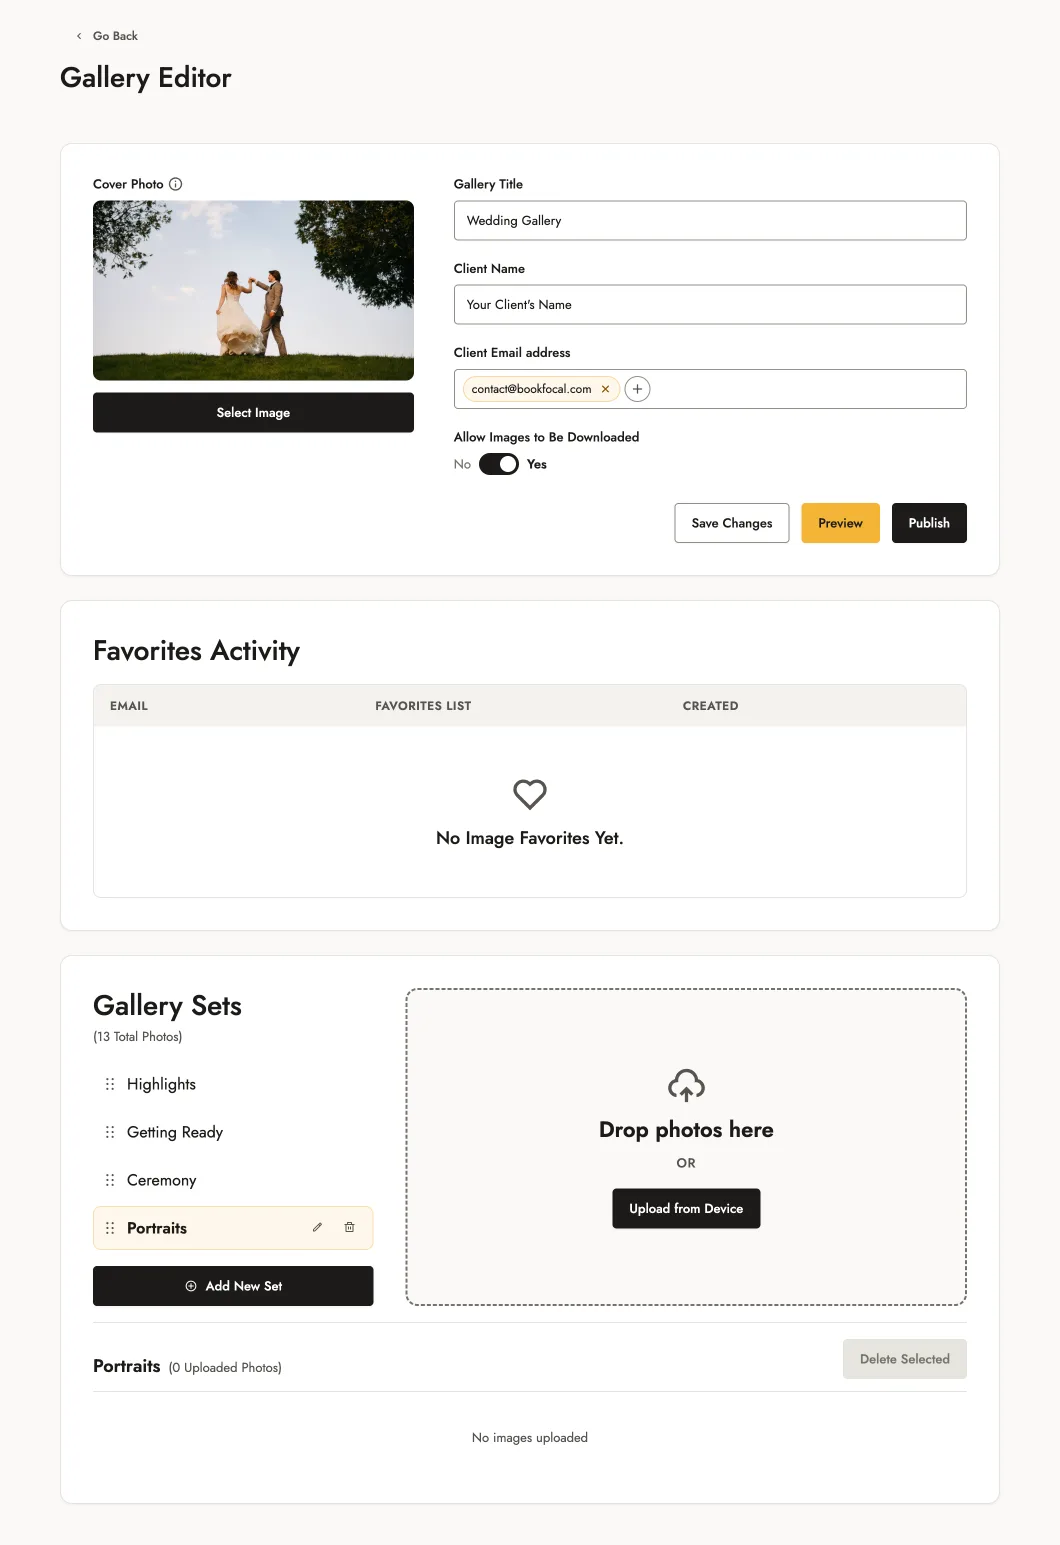
- Add a cover photo, a Gallery Title, and your client’s name and email address.
- Upload your photos, and choose whether your client can download them.
- Click Save Changes.
Drafts aren’t visible to your client, so you can build a gallery over several sittings.
Uploading photos
Drag your photos onto the upload area, or click Upload from Device.
Galleries take photos only, as PNG, JPG, or JPEG files. File names must be under 90 characters.
The Gallery Storage bar on the Galleries page shows how much space you’ve used. To add more, click Add Storage.
Organizing photos into sets
Sets split a gallery into sections your client can click between, such as highlights, getting ready, ceremony, and portraits.
To add one, click Add New Set, name it, and upload photos into it. To rename or delete a set, use the pencil and bin icons beside it.
Your first set is the first thing your client sees, so use it for your best 20 or 30 photos.
Downloads and privacy
To let your client download the photos, switch Allow Images to Be Downloaded to Yes.
If your gallery shows Downloads instead, choose None, Limited, or Full. Limited lets your client download up to the number of photos you set.
Once a gallery is published, you can set its Visibility to Public or Private. A Private gallery asks your client for its PIN, which you can copy with Copy gallery PIN.
Publishing a gallery
When the gallery is ready, click Publish. You can write a thank-you note to your client first. They’re emailed a link to the gallery, and you get a copy of the email.
Requirements lists anything missing before you can publish, such as a cover image.
If you save changes to a published gallery, your client is emailed about them, unless you tick Do not email my client about this change.
To add photos or sets, unpublish the gallery first, then publish it again.
To show a gallery on your homepage, see Featuring packages, posts, galleries and pages. To add it to a client’s portal, see Bookings and client portals.
Your clients’ favorites
Clients can mark photos as favorites. Favorites Activity in the Gallery Editor shows who marked favorites and when. Click View Favorites to see their photos, or Copy List to Clipboard to copy the list.
Related guides
- Bookings and client portalsAccept a booking request, set up your client’s portal, add a booking yourself, and manage your bookings.
- Featuring packages, posts, galleries and pagesChoose which packages, galleries, blog posts and pages appear on your homepage, and in what order.
- Packages and booking optionsAdd and publish a package, choose how clients book it, create add-ons, and organize your packages page.
- Your calendar and availabilityConnect Google Calendar, set the days and hours clients can book, and add a buffer.
Still need help?
Email contact@bookfocal.com and a member of our team will help you.